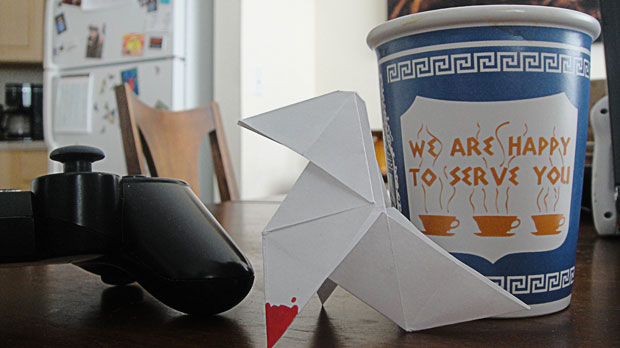
Mandatory installs aren’t unexpected when it comes to PlayStation 3 titles, but developers are fast becoming creative with how they hope to keep you occupied while you wait.
With Ratchet & Clank: A Crack in Time, Insomniac included an incredibly entertaining Captain Quark intro you’d watch while the game copied data to your hard drive, for instance. Tecmo gave you the opportunity to watch a digital comic book with Ninja Gaiden II Sigma. When I popped in a preview build of Quantic Dream’s Heavy Rain in our PS3 test kit a few weeks ago, I was amused by what the French developer had come up with — arts and crafts.
Heavy Rain follows the story of multiple characters, all tied together by mysterious murders perpetrated by someone the media is calling “The Origami Killer.” With each murder, the bodies are found holding a tiny, meticulously folded paper crane/dog/thing. The game’s install screen has you, the player, stepping into the role of “The Origami Killer” by guiding you through a step-by-step on how to fold your own murderous calling card.
According to the instructions, the game box will ship with a square piece of paper for this very purpose. While I didn’t get that, it wasn’t going to stop me from following along at home. Later this week, I’ll have a full preview and hands-on with Heavy Rain, but in the meantime, hit the jump and get ready to do some origami.
Before we start, you’ll want to find yourself a piece of square paper. If it’s too big, your final product will be too unwieldy; if it’s too small, you’ll have trouble bending corners. Choose your square size wisely.
Step 1.
Fold the square over diagonally as shown to make a nice, visible crease.

Step 2.
Fold the square the other way, as shown, making a second visible crease.

Step 3.
Turn the square 45 degrees as shown, and fold three points towards the center.

Step 4.
Fold the upper point backwards.

Step 5.
Fold the four remaining points towards the center.

Step 6.
Now turn the paper over, and fold the lower point towards the top. It should look like a little triangle.

Step 7.
Now reach up, and pull the inner points down.

Step 8.
Step 8 is pretty much making sure that what you have looks like this. Well does it? Good, move on to step 9.

Step 9.
Folder the upper point down.

Step 10.
Step 10, much like Step 8, is just to assure what you have looks like this. Does it? Neat. You’re doing good, and I’m very proud of you. Almost there, killer.

Step 11.
Fold the right half of the paper over to the left, and while doing so, pull out the upper square to create a “nose.”

Step 12.
See? A nose.

Step 13.
Now, pull the “tail” out, as shown.

You’re done! Check back later this week for our preview of Heavy Rain.


